 Sa Teagaisc seo, taispeánfaidh sé duit conas a chruthaigh mé an goblin agus cé na céimeanna a bhí ag teastáil
Imprint | Irish translations created using: Google Translations
In this Tutorial, i'll show you how i created the goblin and which steps were reqiured
Sa Teagaisc seo, taispeánfaidh sé duit conas a chruthaigh mé an goblin agus cé na céimeanna a bhí ag teastáil
 110/5000
In diesem Tutorial wird gezeigt, wie ich den Goblin erstellt habe und welche Schritte erforderlich waren.
110/5000
In diesem Tutorial wird gezeigt, wie ich den Goblin erstellt habe und welche Schritte erforderlich waren.
This is not a real step in means of modeling but it is absolutely required To have at least one colored plane at hand in order to see the results while modeling!
Der nullte Schritt ist kein wirklicher Schritt im tatsächlichen Modellierverfahren aber er ist notwendig - Um zumindest eine einfach einfarbige Ebene vorweisen zu können; mit der die Resultate gesehen werden können.
Ní céim dhílis sa phróiseas samhaltaithe iarbhír an chéim neasach, ach tá sé riachtanach - a bheith in ann eitleán aon-dath ar a laghad a chur i láthair; ar féidir na torthaí a fheiceáil leis.
 So one can just create a 256x256 bitmap; filled with yellow color for example. Next, we just put some shaped forms of color into the file just to be able to play around with the texture coordinates and have presentable values as well.
IT IS REQUIRED THAT TEXTURES ARE QUADRATIC AND THE SIDE-LENGTH IS A POWER OF 2. OTHER TEXTURES won't show up/be displayed/visible whatever you might want to call it. (This is a requirement posed up by the webgl Engine).


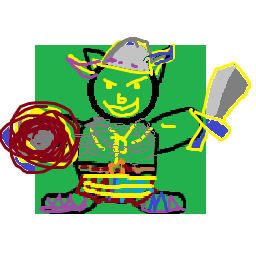
And here is the first (yet poor) goblin texture prototype:

I replaced white with alpha channel using this little
tool i wrote just for that purpose. You can use it to give your own alpha channel to
textures you create. Note that even though its possible to create 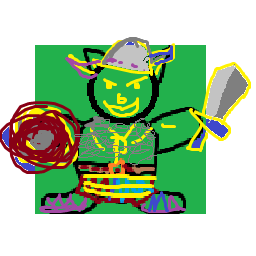 semi-transparent PNGs with that tool, BE WARNED THAT THEY DON'T SHOW UP like this in the 3d viewer. I'm currently helping myself with an algorithm using
 discard; which at least makes it possible to use full transparency...Why? The webgl engine for sure requires a decent fragment shader in order to achieve that task which i'm currently unable to write DUE to my lack of experience in that field. Experiments are ongoing.
here, i prepared the most basic triangle in a file format (It's plain text but carries a .json file format extension instead of .txt)
loadable into my 3d viewer.
CAUTION If you are going to experiment from this stage: The 3d viewer contains a default geometry that is quite the same as the one shown here for test&debug purpose. (It's visible when you load a texture but haven't loaded mesh data so far). The caution is that you might hang stuck wronglx when you accidentally NOT load geometry at all! And keep asking yourself (while still lasting in front of yur pc) WHY the geometry You create is NOT taken over into the program where the answer would be just that (you see the programs default testing geometry). Conclusion: Make up your own, different triangle as fast as possible. Get away from this stupid, standard triangle. You have been warned *over* ^^
{"v":[0,0,0,
1,0,0,
0,1,0],
"texco":

[
0,0,
1,0,
1,1,
],
"ind":


[0,1,2]
}
// The origin in 3d space // A point next to it; just one step to the right // Back to the origin but 1 unit into the sky (y-Axis) // texco means texture coordinates // 2 values (x and y in the bitmap) for each of the 3 points defined above // ind. is short for indices: the numeric ordinal with which we // can address the points defined. 0 is the first point; we have defined // three so we can use points# 0-2. Let's just define the most basic triangle! // That's it!
In order to create simple approach to feet; i shift the triangle away from the center by 0.5 units; then mirror the triangle at the y-axis.